Installing Rocket.Chat Server on Ubuntu 20.04
The guide below describes how to install Rocket.Chat on Ubuntu 20.04
Feel free to read.
To begin with, we update the package repositories and the system itself.
1 | apt-get update -y |
1 | apt-get upgrade -y |
We install the necessary packages:
1 | apt-get install nginx gnupg2 git unzip build-essential curl software-properties-common graphicsmagick -y |
The next step is to install Node.js
1 | curl -sL https://deb.nodesource.com/setup_12.x | bash - |
1 | apt-get install nodejs -y |
We can check the nodejs version by issuing the command:
1 | node -v |
We should get the result:
1 | v12.19.0 |
The next step is to install MongoDB and configure it.
We download the key to the server by issuing the command:
1 | apt-key adv --keyserver hkp://keyserver.ubuntu.com:80 --recv 9DA31620334BD75D9DCB49F368818C72E52529D4 |
We add a repository to the system:
1 | add-apt-repository 'deb [arch=amd64] https://repo.mongodb.org/apt/ubuntu bionic/mongodb-org/4.0 multiverse' |
We install MongoDB
1 | apt-get install mongodb-org -y |
We run them in the system:
1 | systemctl start mongod |
1 | systemctl enable mongod |
Next, you need to edit the default MongoDB configuration file and define a replica set. You can do this with the following command:
1 | nano /etc/mongod.conf |
Add the following lines:
1 2 | replication: replSetName: "replica01" |
Save and close the file, and then restart the MongoDB service, to apply the configuration:
1 | systemctl restart mongod |
Then log into the MongoDB shell and enable the replica with the following command:
1 | mongo |
1 | rs.initiate() |
The log should look like this:
1 2 3 4 5 6 7 8 9 10 11 12 13 | { "info2" : "no configuration specified. Using a default configuration for the set", "me" : "127.0.0.1:27017", "ok" : 1, "operationTime" : Timestamp(1605081439, 1), "$clusterTime" : { "clusterTime" : Timestamp(1605081439, 1), "signature" : { "hash" : BinData(0,"AAAAAAAAAAAAAAAAAAAAAAAAAAA="), "keyId" : NumberLong(0) } } } |
We can exit MongoDB shell with the following command:
1 | exit |
Installation Rocket.Chat
We add a user to the system and give him the appropriate group by issuing the following commands:
1 | useradd -m -U -r -d /opt/rocket rocket --shell /bin/bash |
1 | usermod -a -G rocket www-data |
We will acquire the rights to the rocket directory:
1 | chmod 750 /opt/rocket |
Log in to the rocket user and download rocket.chat files:
1 | su - rocket |
1 | curl -L https://releases.rocket.chat/latest/download -o rocket.chat.tgz |
We unpack the downloaded files and transfer them:
1 | tar -xvzf rocket.chat.tgz |
1 | mv bundle Rocket.Chat |
We go to the script directory and install it:
1 | cd Rocket.Chat/programs/server |
1 | npm install |
Once all dependencies are installed, you can exit the Rocket.Chat user with the following command:
1 | exit |
We create a service file to run on system startup
1 | nano /etc/systemd/system/rocketchat.service |
The content:
1 2 3 4 5 6 7 8 9 10 11 12 13 14 | [Unit] Description=Rocket.Chat server After=network.target nss-lookup.target mongod.target [Service] StandardOutput=syslog StandardError=syslog SyslogIdentifier=rocketchat User=rocket Environment=MONGO_URL=mongodb://localhost:27017/rocketchat ROOT_URL=http://rocket.yourdomain.com PORT=3000 ExecStart=/usr/bin/node /opt/rocket/Rocket.Chat/main.js [Install] WantedBy=multi-user.target |
Remember to change the ROOT_URL = http value://rocket.yourdomain.com on your domain name!
We're reloading the daemon and starting the service:
1 | systemctl daemon-reload |
1 | systemctl start rocketchat |
1 | systemctl enable rocketchat |
The service start status can be checked by executing the command:
1 | systemctl status rocketchat |
It should look like this:
1 2 3 4 5 6 7 8 9 10 11 12 13 14 15 16 17 18 19 | ? rocketchat.service - Rocket.Chat server Loaded: loaded (/etc/systemd/system/rocketchat.service; disabled; vendor preset: enabled) Active: active (running) since Wed 2020-11-11 07:58:01 UTC; 24s ago Main PID: 19951 (node) Tasks: 11 (limit: 4691) Memory: 508.7M CGroup: /system.slice/rocketchat.service ??19951 /usr/bin/node /opt/rocket/Rocket.Chat/main.js Nov 11 07:58:21 ubuntu2004 rocketchat[19951]: ? | MongoDB Version: 4.0.21 | Nov 11 07:58:21 ubuntu2004 rocketchat[19951]: ? | MongoDB Engine: wiredTiger | Nov 11 07:58:21 ubuntu2004 rocketchat[19951]: ? | Platform: linux | Nov 11 07:58:21 ubuntu2004 rocketchat[19951]: ? | Process Port: 3000 | Nov 11 07:58:21 ubuntu2004 rocketchat[19951]: ? | Site URL: http://rocket.yourdomain.com | Nov 11 07:58:21 ubuntu2004 rocketchat[19951]: ? | ReplicaSet OpLog: Enabled | Nov 11 07:58:21 ubuntu2004 rocketchat[19951]: ? | Commit Hash: e37d7ba8ed | Nov 11 07:58:21 ubuntu2004 rocketchat[19951]: ? | Commit Branch: HEAD | Nov 11 07:58:21 ubuntu2004 rocketchat[19951]: ? | | Nov 11 07:58:21 ubuntu2004 rocketchat[19951]: ? +----------------------------------------------------------+ |
We configure the Nginx vhost to work with rocket.chat
We create a new vhost file :
1 | nano /etc/nginx/sites-available/rocketchat.conf |
The content:
1 2 3 4 5 6 7 8 9 10 11 12 13 14 15 16 17 18 19 20 21 22 23 24 25 26 | upstream myrocketchat { server 127.0.0.1:3000; } server { listen 80; server_name rocket.yourdomain.com; access_log /var/log/nginx/access.log; error_log /var/log/nginx/error.log; location / { proxy_pass http://myrocketchat/; proxy_http_version 1.1; proxy_set_header Upgrade $http_upgrade; proxy_set_header Connection "upgrade"; proxy_set_header Host $http_host; proxy_set_header X-Real-IP $remote_addr; proxy_set_header X-Forward-For $proxy_add_x_forwarded_for; proxy_set_header X-Forward-Proto http; proxy_set_header X-Nginx-Proxy true; proxy_redirect off; } } |
Remember to change a few values:
server 127.0.0.1:3000; – 127.0.0.1 we replace the ip of our server.
server_name rocket.yourdomain.com; – rocket.yourdomain.com is replaced with our domain address.
We create a symbolic link to activate vhost:
1 | ln -s /etc/nginx/sites-available/rocketchat.conf /etc/nginx/sites-enabled/ |
The next step is to check if the vhost was created correctly:
1 | nginx -t |
And the result:
1 2 | nginx: the configuration file /etc/nginx/nginx.conf syntax is ok nginx: configuration file /etc/nginx/nginx.conf test is successful |
If everything is ok, restart Nginx
1 | service nginx restart |
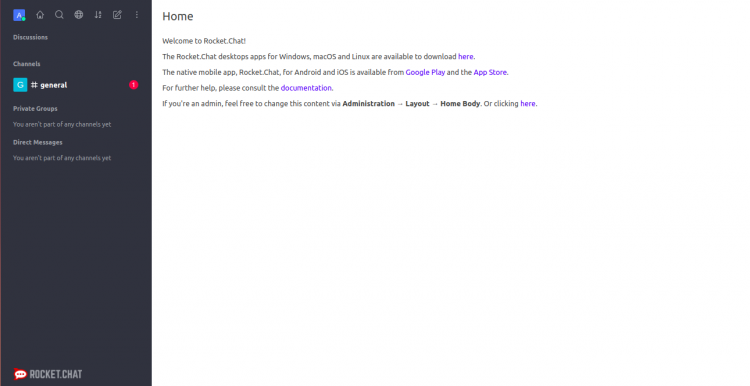
Now the Rocket.chat installation process should start under our domain or server IP
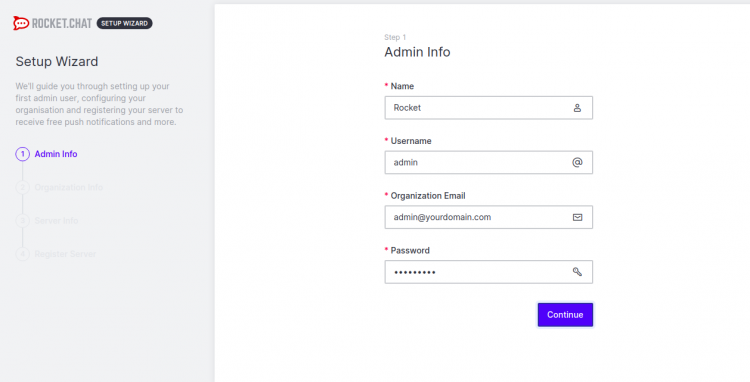
Enter an administrator name, address e-mail, password and click Continue. You should see the following page:
We fill in at our discretion.
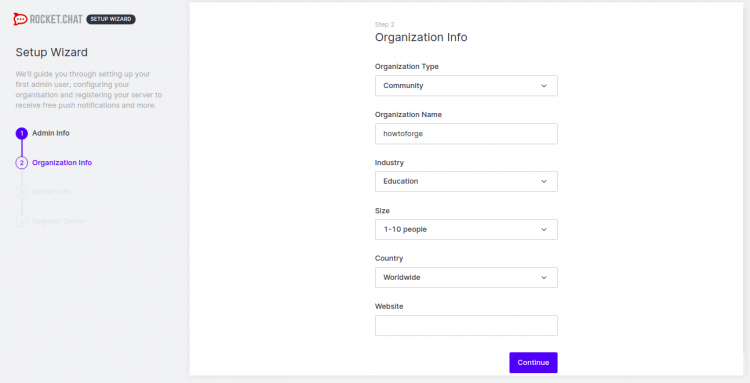
The next step is to select the language and server type

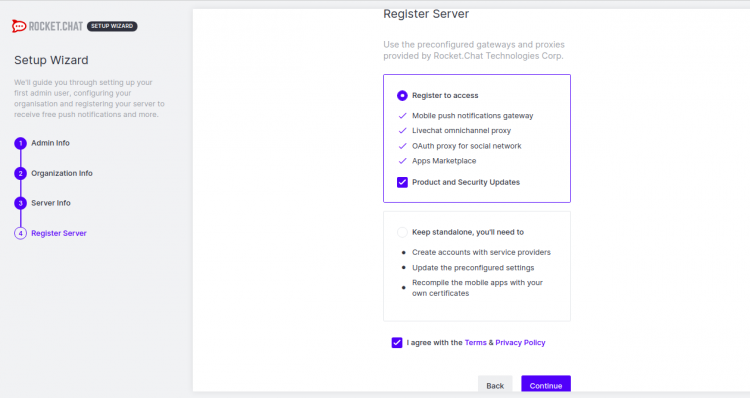
We accept license:
That's all our rocket.chat is already installed and available under our domain!