
Install Pi-Hole on Ubuntu 18.04
Pi-Hole. This is an application, which from the DNS server blocks unwanted pages and ads. All you need to do is install Pi-Hole on a device and enter DNS as Pi-Hole in the router's settings in DHCP. We can install on any device today I will present how to do it on Ubuntu 18.04
We log in to our device where we want to install pi-hole and at the beginning we update the packages and system:
We run a terminal and issue the command:
1 | sudo apt-get update && sudo apt-get upgrade -y |
We download the pi-hole package and run it:
1 | curl -sSL https://install.pi-hole.net | bash |
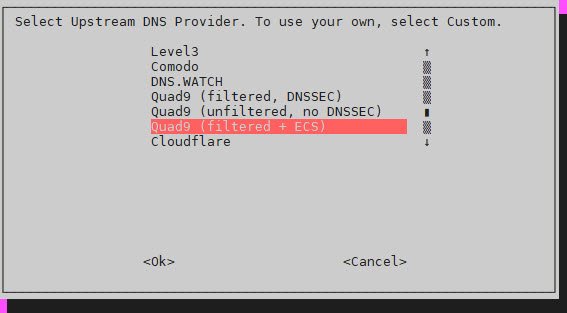
We must select the primary DNS server (Google, openDNS, Cloudflare )
The installer will do everything for us automatically. It is worth reserving the MAC address in DHCP on the router. We will see all the information on the screen, ie. address IP, web login address or password. During installation we will have to decide if we want access via the Web application and whether Lighttpd should be a web server.
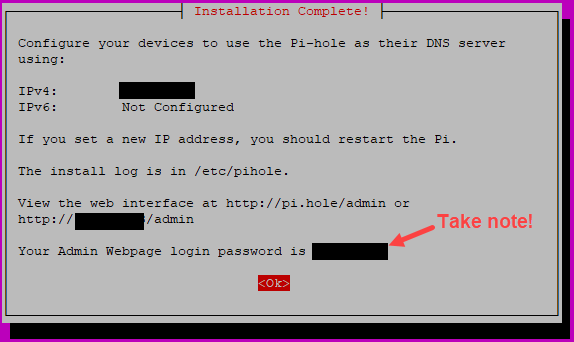
The login panel is available at:
naszadresip / admin /
We log in with the specified login details.
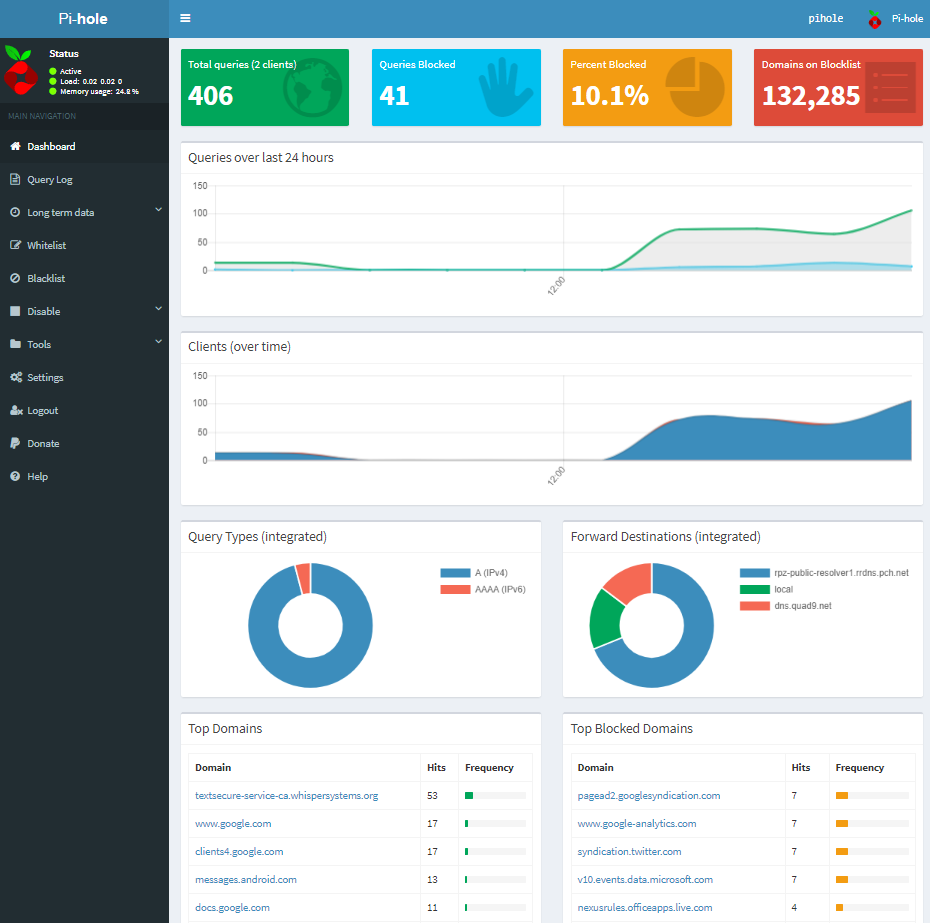
we'll see in the statistics panel, what pages are blocked. Which IP addresses use DNS PI-Hole etc..
The last step for the server to control and block unwanted sites is to change the DNS server IP settings to Pi-Hole. In this case it is the address 192.168.3.22. It's best to set it on the main router in the DHCP settings, our Pi-Hole DNS server. Thanks to this, each device will automatically use Pi-Hole. In the Web application we will see, who is connected.
We can also edit dns on any device that has to have filtered traffic, then set a static ip address and enter our as dns server.
Finally, some important commands:
1 2 3 4 5 | pihole -t #pokazuje co aktualnie jest filtrowane pihole -c #informacje / dashboard pihole -a -p #zmiana hasła do panelu web pihole -r #tryb naprawy pihole -u #tryb update'u |